
Embarking on a DIY journey to build wall shelves is not just a fantastic way to add a personal touch to your space, but it’s also incredibly rewarding. Whether you’re a seasoned DIY enthusiast or a newbie, learning how to build wall shelves is essential. These racks offer a perfect blend of functionality and style, transforming any blank wall into a practical storage area. With the right tools and guidance, anyone can undertake this project. Not only do barricade racks maximize your living area, but they also provide an opportunity to display your favorite items in a unique way. This article will guide you through the process, ensuring that your racks are not only sturdy and reliable but also a reflection of your personal taste.
What Type Of Wood Is Best For Building Wall Shelves?
The best type of wood for building wall shelves depends on the look you want to achieve and the strength required for the rack. For a classic, elegant look, hardwoods like oak, cherry, or walnut are great choices. These woods are durable and can hold heavier items without warping or bending. If you prefer a more rustic or natural look, reclaimed wood or knotty pine can add character to your rack while still providing adequate strength.
How Much Weight Can Wall Shelves Typically Hold?
The weight capacity of wall shelves can vary widely depending on the type of shelf, the material it’s made of, and how it’s installed. Generally, floating racks made of solid wood or metal can support anywhere from 20 to 50 pounds per linear foot when properly installed into wall studs. However, it’s important to always check the manufacturer’s guidelines for specific weight limits.
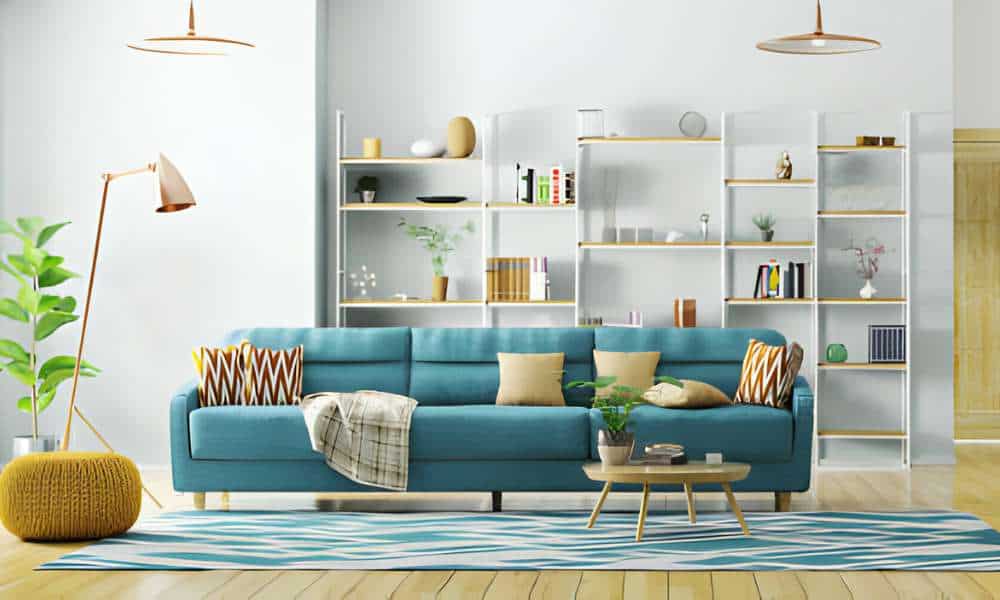
Wall Shelves As Space Dividers
Introducing wall shelves as space dividers is an ingenious way to utilize your living space effectively. These racks not only serve as practical storage solutions but also as stylish dividers, delineating different areas in a room without the need for bulky partitions. For example, in a studio apartment, build wall shelves can separate the living area from the bedroom, providing a sense of privacy while keeping the space open and airy. This approach to building barricade racks is not just about functionality; it’s also about adding an aesthetic element to your home, turning simple shelves into a focal point of your interior design.
Building Adjustable Wall Shelves
Adjustable wall shelves offer the ultimate flexibility in home organization and design. The process of building these racks involves installing tracks on the wall, which allow for easy adjustment of shelf heights according to your changing needs. This is particularly useful in areas like the kitchen or a home office, where the items you need to store might vary in size. Adjustable racks are a practical solution, allowing you to customize your storage space without the hassle of permanent restructuring. Plus, they add a modern, dynamic aspect to your room, adapting seamlessly to your evolving lifestyle.
Measuring And Planning Wall Shelves
The key to successfully building barricade racks lies in meticulous measuring and planning. Before picking up any tools, it’s crucial to decide on the size and number of racks you need, and where they will be placed. This involves measuring the wall space, considering the height and depth of the racks, and planning for the weight they will need to support. Accurate measurements ensure that the racks will fit perfectly in the designated space and look proportional to the room. Proper planning also helps in avoiding common mistakes, such as misaligned shelves or insufficient storage space, making your DIY project a sure success.
Cutting The Timber To Size
Once your measurements and plans are in place, the next step in building barricade racks is cutting the timber to size. This step requires precision and attention to detail. Using a saw, carefully cut the wood according to your measurements, ensuring each piece is straight and uniform. This is crucial for both the aesthetics and stability of your racks. After cutting, it’s important to sand the edges to smooth out any roughness, preparing the timber for staining or painting. Remember, the quality of your cuts will greatly impact the final look and durability of your barricade racks, making this step one of the most important in the shelf-building process.
Bray And Preparing The Wood
When embarking on the journey of build wall shelves, the first crucial step is selecting and preparing the wood. Start by choosing high-quality lumber that suits your aesthetic preferences and fits the intended space. Whether you opt for sleek and modern pine or the rustic charm of reclaimed wood, ensure it’s smooth and free from imperfections. Next, measure and cut the wood to your desired shelf dimensions. Accurate measurements are vital to create sturdy and well-fitted shelves. Sand the edges and surfaces to achieve a smooth finish, ready for the next stages of your project.
Acerbic Holes For The Brackets
To ensure the stability and strength of your barricade racks, it’s imperative to install brackets securely. Measure and mark the positions where you want to attach the brackets on the wall. Use a level to ensure they are perfectly aligned. Then, drill precise holes into the wall for the brackets. These holes should be slightly smaller than the wall anchors you’ll be using to secure the brackets. Insert the anchors into the holes and attach the brackets firmly using screws. Properly anchoring the brackets ensures your racks can support the weight of your items without sagging or falling.
Employing Finish Or Paint To The Shelves
Enhancing the appearance and durability of your wall racks is achievable by applying a finish or paint. If you prefer a natural wood look, consider applying a clear wood finish, such as varnish or polyurethane. This not only protects the wood from moisture and wear but also brings out its natural beauty. On the other hand, if you want to add a pop of color or match the shelves to your room’s decor, painting is a great option. Choose a paint color that complements your interior design and apply it evenly to the shelves. Let the paint dry thoroughly before moving on to the next step.
Maintenance And Care For Wall Shelves
Once your barricade racks are installed and looking beautiful, it’s essential to maintain and care for them to ensure their longevity. Regularly dust and clean the shelves to prevent dirt and grime buildup. Avoid placing excessively heavy items that could strain the brackets or racks. Periodically check for any loose screws or brackets and tighten them if necessary. If you notice any signs of damage or wear, address them promptly to prevent further deterioration. By maintaining and caring for your wall racks, you can enjoy their functionality and aesthetic appeal for years to come.
Using Worn Materials
When it comes to crafting your own barricade racks, one innovative approach is to use worn materials. Repurposing old wood or reclaimed materials not only adds character to your shelves but also contributes to sustainability. By giving a new life to materials that might otherwise go to waste, you’re not only creating functional storage but also reducing your environmental footprint. To start, gather your chosen materials and prepare them for the transformation into beautiful, rustic wall racks. Embrace the imperfections and unique qualities of these materials, as they will give your shelves a distinct and charming look.
Integrating Strip Lighting Into Wall Shelves
To take your build barricade racks to the next level, consider integrating strip lighting. This modern and practical addition not only illuminates your racks but also creates a visually appealing ambiance in any room. Installing strip lighting requires some electrical know-how, but with the right guidance, it can be a manageable DIY project. The soft glow of the lights can highlight your favorite items on the racks, making them a focal point in your home. Whether you’re showcasing collectibles or simply creating a warm atmosphere, strip lighting can elevate your barricade racks to a whole new level.
Shelving Solutions For Renters
Shelving solutions for renters can be a game-changer when it comes to maximizing space and adding functional storage to your home. How To build wall shelves is a great way to achieve this, providing a customizable and versatile option that doesn’t require any damage to the walls. With the use of floating shelf brackets and sturdy materials such as wood or metal, renters can create stylish and practical shelving units that cater to their specific storage needs.
Functionality In Shelf Building
When building barricade racks, it’s crucial to prioritize functionality. Consider the purpose of your shelves and plan their design accordingly. Are you creating storage for books, displaying decorative items, or organizing your kitchen essentials? The layout, size, and arrangement of your racks should align with their intended use. Additionally, think about accessibility. Ensure that the items you place on the shelves are easy to reach and use. By focusing on functionality, you’ll maximize the benefits of your wall racks and make your daily life more convenient and organized.
The Final Thought
To build wall shelves can be a rewarding and practical DIY project that adds both functionality and style to any space. Whether you are looking to organize your home, display cherished items, or simply add extra storage, barricade racks offer a versatile solution. By following the step-by-step guide provided in this article, you can create custom racks that perfectly suit your needs and preferences. Remember to choose high-quality materials and take precise measurements to ensure the stability and durability of your shelves. So why wait? Get started on your wall shelf project today and transform your living space into a more organized and visually appealing environment!