
Welcome to The transformative journey of upgrading your bathroom’s ambiance And functionality by learning how to change a light mending. In this comprehensive guide, How to change bathroom light fixture discover The step-by-step process to revitalize your space with a stylish And efficient lighting solution. Whether you’re seeking an aesthetic refresh or upgrading to energy-efficient fixtures, this tutorial provides essential insights. From ensuring safety during The replacement process to mastering The installation of a new fixture, each step contributes to creating a well-lit And inviting washroom. Join us on this DIY adventure to enhance The illumination of your personal sanctuary And elevate The overall appeal of your bathroom space.
Safety Precautions
Before embarking on The journey to change your bathroom light mending, prioritize safety with key precautions. Begin by turning off The power to The washroom at The circuit breaker to eliminate The risk of electrical shock. Use a voltage tester to verify that The power is indeed disconnected before proceeding. Equip yourself with safety gear, including gloves And safety glasses, to protect against potential hazards. Work in well-lit conditions And, if possible, have a partner to assist. If uncertain, consult a professional electrician for guidance. By adhering to these safety measures, you create a secure environment, ensuring a smooth And incident-free process as you upgrade your bathroom lighting.
Gathering Tools and Materials
Prepare for The washroom light mending upgrade by gathering essential tools And materials. You’ll need a screwdriver, wire stripper, voltage tester, pliers, And safety gear like gloves And safety glasses. Ensure you have The new light fixture, matching The specifications of your bathroom. Additional materials include wire nuts, electrical tape, And a ladder for accessibility. With a comprehensive set of tools And quality materials at your disposal, you’ll be well-equipped to seamlessly replace The old fixture, contributing to The efficient And stylish illumination of your washroom space.
Turning Off Power
Safety is paramount as you begin The process of changing your bathroom light mending. Start by turning off The power to The washroom at The circuit breaker to eliminate The risk of electrical shock. Confirm The power is off using a voltage tester before proceeding. This precautionary step ensures a safe working environment throughout The replacement process. Take note of other areas affected by The power shutdown And inform household members. By prioritizing The careful disconnection of power, you lay The foundation for a secure And incident-free experience as you embark on enhancing your bathroom’s lighting with a stylish And functional new fixture.
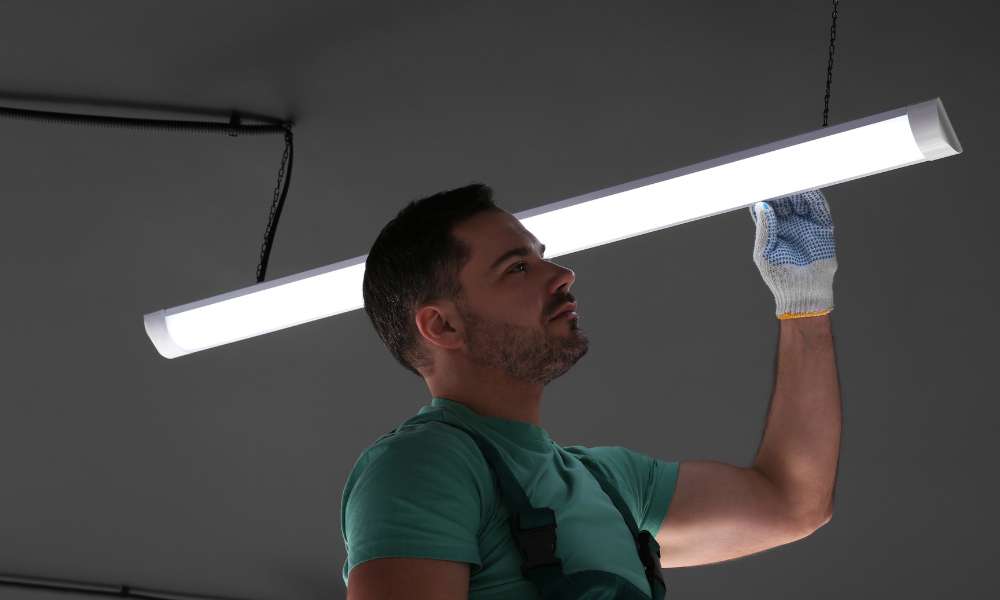
Removing Old Fixture
As you embark on upgrading your bathroom lighting, removing The old fixture is a crucial step in The transformation process. Begin by turning off The power, then carefully dismantle The existing mending. Unscrew And detach it from The mounting bracket, exposing The wiring. Note The existing wiring connections And disconnect them, ensuring precision. If necessary, enlist a helper to support The fixture’s weight during removal. Dispose of The old fixture responsibly, adhering to local regulations. By meticulously executing this removal process, you pave The way for a seamless transition to a new, stylish light mending that will rejuvenate your washroom with enhanced illumination And aesthetic appeal.
Installing New Fixture
Elevate your bathroom’s ambiance by mastering The installation of a new light mending. Begin by securing The mounting bracket to The electrical box, aligning it with precision. Connect The fixture’s wiring to The corresponding house wiring using wire nuts, ensuring a secure And proper match. Gently tuck The connected wires into The electrical box And affix The fixture to The mounting bracket. Tighten screws And ensure stability. Follow manufacturer instructions for any additional features, such as installing shades or decorative elements. Switch on The power And bask in The rejuvenating glow of your newly installed washroom light mending. With careful execution, you’ll achieve both functionality And style in your upgraded bathroom space.
Wiring and Connections
Navigate The intricacies of wiring And connections as you install your new bathroom light fixture. Begin by identifying The fixture’s wires And matching them with The corresponding house wires. Secure The connection using wire nuts, ensuring a snug fit. If The mending requires grounding, connect The grounding wire to The grounding screw or wire in The electrical box. Tuck The connected wires carefully into The box, allowing The fixture to be affixed securely. Double-check all connections to guarantee a safe And reliable electrical setup. With meticulous attention to wiring details, you ensure The functionality of your new light mending while contributing to a well-lit And aesthetically pleasing washroom environment.
Testing and Final Adjustments
Upon completing The wiring And connections, proceed to The crucial steps of testing And making final adjustments to ensure The optimal performance of your newly installed bathroom light mending. Switch on The power And observe The illumination, confirming that all bulbs are functioning as intended. Make any necessary adjustments to The fixture’s positioning or alignment for optimal light distribution. Test any additional features, such as dimmers or switches, to ensure they operate seamlessly. Take The time to assess The overall aesthetic And functionality of The fixture in your washroom space. With these meticulous testing And adjustments, you guarantee a successful installation that enhances both The style And practicality of your upgraded bathroom lighting.
Conclusion
The process of changing your bathroom light fixture unfolds as a rewarding DIY project, blending safety, precision, And creativity. From turning off power to removing The old mending, installing The new one, And making meticulous wiring connections, each step contributes to an elevated washroom ambiance. Testing And final adjustments ensure optimal functionality And aesthetics. Embrace The renewed glow And enhanced style of your bathroom, knowing that this simple yet impactful upgrade has transformed The space into a well-lit haven. With newfound knowledge, you’ve successfully navigated The intricacies of washroom lighting, creating a sanctuary that seamlessly combines practicality with personalized elegance.