
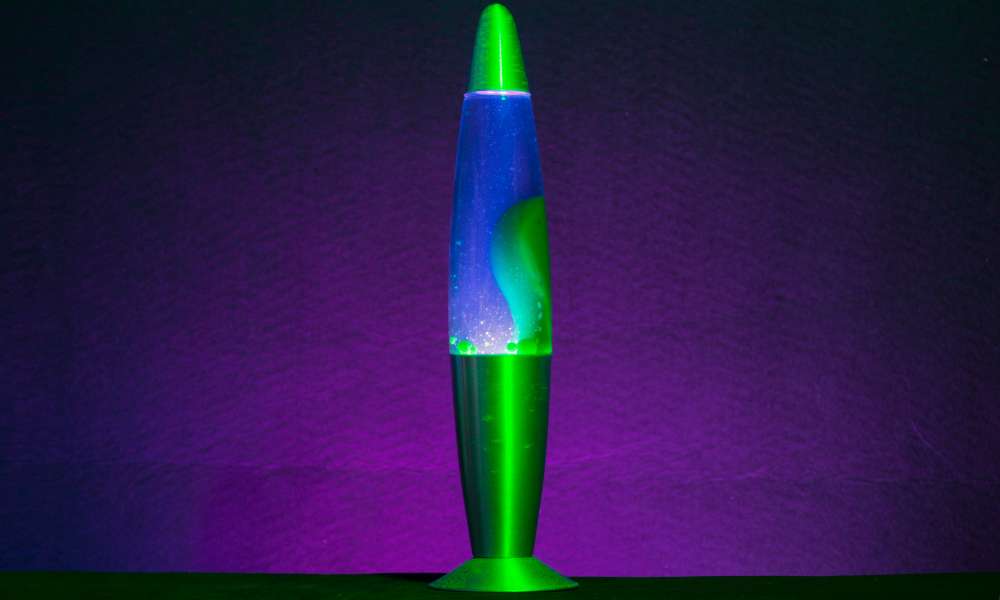
Lava lamps are fascinating decorative items that blend art and science, offering a mesmerizing display of colorful, floating blobs. If you’ve ever wondered how to make a lava lamp at home, you’re in for a treat. Creating your own lava lamp is a fun, hands-on project that requires just a few basic materials. By mixing water, oil, food coloring, and an effervescent tablet, you can produce the iconic, flowing effect that head torch are famous for. This DIY activity is not only a great way to understand the principles of density and immiscibility, but it’s also a fantastic opportunity to craft a personalized piece of decor. Whether you’re looking to add a retro touch to your room or simply enjoy a creative project, making a head torch is a rewarding experience that combines simplicity with captivating results.
1. Materials needed: Ingredients and tools overview
To make your own lava lamp, you’ll need a few simple materials and tools, most of which you likely have at home. Start with a clear glass container, such as a bottle or jar, which will serve as the body of your lamp. You’ll need water and vegetable oil, as these two liquids create the contrasting layers essential for the lava effect. Food coloring is necessary to give your lamp a vibrant hue, while an effervescent tablet, like Alka-Seltzer, will provide the motion that makes the “lava” blobs rise and fall. Additionally, having a funnel on hand will make pouring liquids easier, and a small light source, like a flashlight or LED, Lava lamps can enhance the visual effect by illuminating the lamp from below. With these simple ingredients and tools, you’re ready to create a mesmerizing head torch in no time.
2. Choosing a container: Size and shape
Selecting the right container is crucial when making a lava lamp, as it directly impacts the visual effect and overall functionality. The size and shape of the container determine how the liquid and lava blobs move, so it’s important to choose wisely. A tall, narrow container is ideal because it allows the lava to rise and fall in a more pronounced manner, creating that classic, mesmerizing flow. Glass containers are preferred for their clarity and heat resistance, which are essential for maintaining the lamp’s aesthetic and safety. When choosing the container, also consider the opening size; a container with a narrower neck helps to focus the movement, making the lava more dynamic. Whether you opt for a recycled bottle or a specialized glass vessel, Lava lamps the container’s dimensions and shape will play a significant role in your head torch final appearance.
3. Prepare the base: Adding liquid components
To start preparing the base of your lava lamp, begin by selecting a clean, clear container, like a glass bottle or jar, that will serve as the lamp’s body. The first step is to fill about two-thirds of the container with water. This water will act as the primary medium through which the lava-like blobs will move. Next, add a few drops of food coloring to the water to achieve the desired hue. Stir gently to evenly distribute the color. Now, it’s time to introduce the oil. Carefully pour vegetable or baby oil into the container, leaving some space at the top. The oil will float on top of the water, Lava lamps setting the stage for the classic head torch effect. Since water and oil don’t mix, this combination creates the foundation for the mesmerising motion that defines a head torch.
4. Creating lava effect: Mix oil and water
To create the signature lava effect in your homemade lava lamp, start by carefully combining oil and water. These two liquids don’t mix because oil is less dense and hydrophobic, meaning it repels water. Begin by filling your container most of the way with water, then add a layer of oil on top. The oil will float above the water, setting the stage for the lava-like movement. Next, add a few drops of food colouring, which will pass through the oil and color the water below. The real magic happens when you drop in an effervescent tablet, which releases gas bubbles that rise through the water, carrying the coloured droplets into the oil. As the bubbles reach the surface and pop, the coloured droplets sink back down, Lava lamps creating the dynamic, mesmerising movement that makes head torch so captivating.
5. Adding colour: Dye for vibrant display
Adding color to your lava lamp is the step where creativity truly shines. The dye you choose will determine the overall mood and visual impact of your lamp, transforming a simple mixture of oil and water into a vibrant, eye-catching display. To achieve this, select a liquid food coloring that contrasts well with the oil, ensuring the colour remains suspended in the water without mixing with the oil. Just a few drops of dye can create a stunning effect, Lava lamps with the colored water blobs rising and falling gracefully within the lamp. You can experiment with different shades or even combine colours to create a unique, personalised look. This step is not only about visual appeal but also about enhancing the dynamic movement of your head torch, making it a captivating addition to any room.
6. Adding effervescence: Tablets for movement
Adding effervescence to your lava lamp is the key to bringing it to life, creating the signature bubbling motion. This step involves using effervescent tablets, like Alka-Seltzer, which react with the water-based solution in the lamp. When you drop the tablet into the container, it releases carbon dioxide gas, causing bubbles to form and rise through the oil layer. These bubbles carry small portions of the colored water upward, creating the iconic lava-like movement. As the gas escapes, the water droplets sink back down, restarting the cycle. To keep the motion going, you can add more tablet pieces as needed. This process not only enhances the visual appeal of your head torch but also demonstrates the scientific principles of gas release and density. The result is a captivating, ever-changing display that’s both educational and entertaining.
7. Sealing the container: Secure for safety
Sealing the container is a crucial step in making a lava lamp, as it ensures safety and preserves the integrity of your creation. After you’ve added the ingredients and achieved the desired lava effect, it’s essential to securely close the container to prevent leaks or spills. Using a tight-fitting lid or cap, firmly seal the container to keep the liquid contents contained, especially since the lamp will be heated to activate the lava flow. You might also consider reinforcing the seal with tape or adhesive to add an extra layer of protection. This precaution not only prevents accidents but also ensures that your lava lamp remains functional over time. Proper sealing is particularly important if the lamp will be handled frequently or displayed in a busy area. By taking this step seriously, you can safely enjoy the captivating motion of your homemade head torch.
8. Heating: Activate lava lamp motion
Heating is the key to activating the signature motion in your homemade lava lamp. Once you’ve assembled the ingredients, including water, oil, food colouring, and an effervescent tablet, it’s time to introduce heat. This step is crucial because the heat causes the wax (or oil) to expand and become less dense, rising through the water. As the wax cools near the top, it becomes denser and sinks back down, creating the mesmerising lava-like flow. To achieve this effect, place your head torch on a heat source, such as a low-wattage light bulb or a warm surface, and watch as the blobs begin to rise and fall rhythmically. It’s essential to monitor the temperature carefully to avoid overheating, which can disrupt the flow or damage the lamp. With the right balance of heat, your head torch will come to life with continuous, soothing movement.
9. Testing: Ensuring proper flow and movement
Testing your homemade lava lamp is crucial to ensure that the flow and movement are as mesmerising as you envisioned. After sealing the container, place your head torch on a stable surface, and activate it by turning on the heat source or adding the effervescent tablet, depending on the type of lamp you’ve created. Observe the rising and falling blobs to see if they are moving smoothly and creating the desired effect. If the movement seems sluggish or too rapid, you may need to adjust the ratio of oil to water or the temperature. Ensuring the proper flow and movement not only enhances the visual appeal of your head torch but also confirms that the elements inside are interacting as they should. With patience and a bit of tweaking, you can achieve a perfect balance that brings your head torch to life.
10. Troubleshooting: Fixing common issues encountered
When making your own lava lamp, you might encounter a few common issues, but don’t worry—most can be easily fixed. If the wax in your lamp isn’t moving, it could be because the liquid isn’t warm enough. Try gently heating the lamp to activate the wax flow. Another problem might be the wax separating from the liquid, which often happens if the oil-to-water ratio is off. Adjust the quantities to balance the two fluids. If the colors are not vibrant, Lava lamps ensure you’re using enough food coloring and mix thoroughly. Lastly, if the lamp isn’t bubbling as expected, it might be due to an insufficient amount of effervescent tablets. Simply add more tablets and see if that helps. With a bit of troubleshooting, you’ll soon have a fully functional head torch to enjoy.
11. Final thoughts: Enjoy your homemade lamp
Now that you’ve successfully made your own lava lamp, it’s time to enjoy the fruits of your labor! Watching the mesmerising movement of the coloured blobs is both relaxing and satisfying, adding a unique touch to any room. Your homemade lamp isn’t just a decorative piece; it’s a testament to your creativity and DIY skills. Remember, the fun doesn’t stop here—experiment with different colours, container shapes, and sizes to personalise your head torch even further. If you find that the flow slows down or the lamp needs a refresh, you can easily adjust the ingredients red more: How Many Bookshelves to get the perfect effect. Display your lamp proudly and share your creation with friends and family. This simple yet captivating project provides endless enjoyment and a cool conversation starter.
conclusion
making a lava lamp is a delightful and educational project that brings a touch of retro charm into your home. By following a few straightforward steps—choosing the right materials, mixing them carefully, and observing the effects you create a unique and captivating light source. This DIY project not only enhances your understanding of basic scientific principles but also offers a rewarding sense of accomplishment. As you enjoy the dynamic movement and vibrant colors of your homemade head torch, you’ll appreciate the blend of creativity and science involved in its creation. Whether as a personal decoration or a thoughtful gift, your head torch will surely be a standout feature. Embrace the opportunity to experiment and refine your technique, and most importantly, have fun with this engaging craft.